Chicken Cage Installation & Maintenance Guide
 time:
2025-10-29
time:
2025-10-29 Chicken Cage Installation & Maintenance Guide
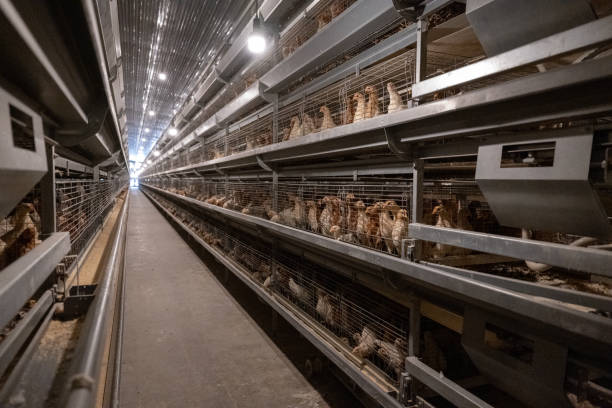
Setting up a successful poultry farming operation starts with choosing the right equipment—especially chicken cages. At Livi Machinery, we’ve spent over a decade helping farmers around the world build efficient, reliable, and smart poultry housing systems. One of the most common questions we get? “How do I install and maintain chicken cages properly?” Whether you’re setting up your first poultry house or upgrading an existing one, this comprehensive guide will walk you through every step—from assembly to daily care—so your system lasts longer and performs better.
If you’re investing in modern chicken cages, proper installation isn’t just about putting pieces together. It’s about creating a safe, productive environment for both birds and farmers. In this article, we’ll share practical tips, professional insights, and maintenance best practices based on real-world experience. Let’s get started.
Step-by-Step Installation: Building Your Chicken Cage System Right
Before any tools even touch the cage parts, preparation is key. Start by checking the delivery package against your order list. Ensure all components—frames, trays, feeders, water lines, manure belts (if applicable), and connectors—are accounted for. If anything is missing or damaged, contact us immediately so we can resolve it fast.
Next, inspect the poultry house floor. It must be level and dry. Uneven ground causes instability, uneven weight distribution, and stress on structural joints—this shortens the lifespan of your cage system. Use a spirit level to confirm flatness across the entire area where the cages will stand. Also make sure there’s enough clearance from walls for airflow, worker access, and future upgrades.
Now it’s time to assemble. Most of our cage systems use modular designs, which means they connect like puzzle pieces—simple, fast, and secure. Begin from one corner of the house and work row by row. Connect vertical supports first, then attach horizontal beams. Don’t fully tighten the bolts yet; leave them slightly loose until the full section is aligned. This helps absorb small deviations in floor flatness.
Install the manure trays (or conveyor belts) at the base before stacking upper tiers. Make sure they slope slightly toward the end for easy waste removal. Next, add nesting areas, feed troughs, and water lines. When installing automatic watering systems, check that nipples are level with bird height—and test each line under pressure before closing panels.
Once everything is set, double-check alignment and stability. Shake each module gently—there shouldn’t be wobbling. Then go back and fully tighten all connections. A well-installed cage system should withstand regular cleaning, high stocking density, and daily farm operations without deformation.
Remember: always follow the manufacturer’s instructions specific to your model. Every cage type—whether it’s for broilers, layers, or chicks—has unique requirements. Skipping steps might save 10 minutes today but could cost hours in repairs later.
Why Proper Maintenance Makes All the Difference
A chicken cage may look sturdy, but like any farming equipment, it needs consistent care to deliver long-term value. Think of your cage system as the backbone of your poultry house. When maintained correctly, it supports healthier birds, reduces labor costs, and improves overall productivity.
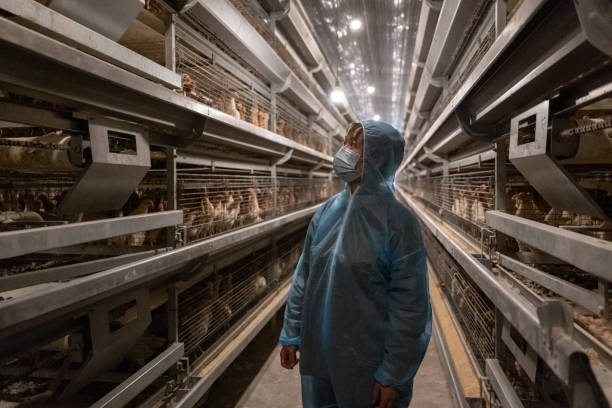
Start with daily checks. Walk through the house and observe if any birds appear trapped or injured. Look for broken wires, bent trays, or loose fasteners. Pay close attention to weld points—these are stress zones that can crack under constant load. Even a small gap can grow into a major issue over time.
Weekly cleaning is non-negotiable. Remove built-up droppings, spilled feed, and feathers from cage surfaces. These not only harbor bacteria but also attract pests like mites and rodents. For farms using plastic-coated or galvanized cages (like ours), avoid high-pressure hoses directly aimed at joints—they can force water into metal layers and speed up rusting underneath the coating.
Instead, rinse gently with lukewarm water, using mild detergents if needed. After washing, let the area air-dry completely before reintroducing birds. Moisture trapped between frame gaps leads to corrosion—even with anti-rust treatments.
Lubricate moving parts monthly. That includes hinges on doors, rollers on manure belts, and adjustment screws on automated feeders. Use food-safe grease or light machine oil compatible with agricultural environments. This keeps mechanisms running smoothly and prevents premature wear.
Seasonally, perform a full structural inspection. Check for signs of corrosion, especially in humid climates. Touch up paint chips immediately with zinc-rich primer to prevent rust spread. Tighten all bolts and assess whether load-bearing posts still stand vertically. Over time, repeated cleaning and bird movement can shift heavier modules off-center.
Also review how space is being used. Has bird behavior changed? Are certain areas showing more damage? These clues help optimize layout for next flock cycle. Many of our clients find that rotating cage orientation or adjusting feeder placement boosts comfort and lowers aggression among birds.
Prevent Common Problems Before They Happen
Even top-quality equipment faces challenges—especially when exposed to biological stress, chemical cleaners, and mechanical loads. But most issues can be prevented with proactive habits.
One frequent problem? Feed blockages in automatic systems. This often happens when low-quality mash gets damp or clumps form in hoppers. To stop this, clean feed lines every two weeks using soft brushes or compressed air. Never pour liquid into the hopper unless designed for it.
Another issue is leaking water lines. While nipple drinkers are highly efficient, mineral buildup can interfere with seals. Flush lines periodically with diluted vinegar or approved descaling agents. Replace any dripping nipples right away—they waste water and wet the litter, increasing ammonia levels and footpad dermatitis risk.
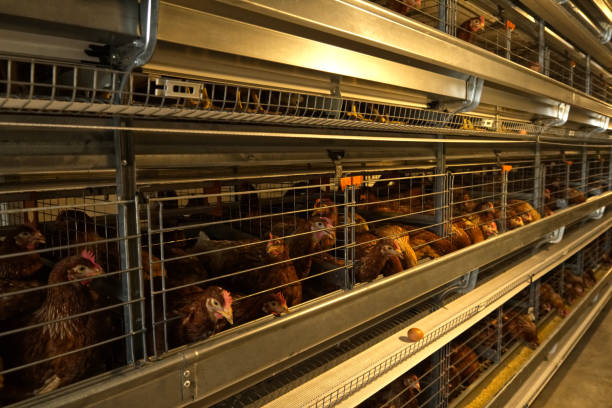
Cage wire breakage usually results from excessive crowding or improper handling during cleaning. Respect the recommended bird capacity per cage unit. Overstocking creates constant pecking and pressure on bars. And never drop heavy tools inside cages—that risks bending support grids.
Don’t overlook ventilation either. Good airflow keeps humidity low and minimizes corrosive gases like ammonia. Poor air circulation accelerates material degradation, particularly around ceiling-level tiers. Install fans or natural vents according to barn size and local climate.
Finally, train your team. Everyone who interacts with the cages should know what to watch for and how to report concerns early. Create a simple checklist for daily inspections. Empowering workers means problems get caught faster—and fixes are cheaper.
At Livi Machinery, we offer free digital training resources and video tutorials for all our cage models. Just scan the QR code included in your manual or visit our website. Knowledge is your first line of defense against downtime.
Maximizing Longevity and Efficiency for Years to Come
Your chicken cage system isn’t just a piece of equipment—it’s a long-term investment in your farm’s future. With correct installation and routine maintenance, many of our customers report over 15 years of service life from their units, even under intensive commercial use.
To get the most out of yours, adopt a preventive mindset. Treat small issues before they become expensive failures. Keep spare parts like fasteners, nipples, and tray clips on hand. We stock replacement kits globally so you’re never stuck waiting.
Also consider integrating smart monitoring tools. Modern sensors can track cage temperature, humidity, feed consumption, and bird movement—all sent straight to your phone. Pairing physical durability with digital insight gives you unprecedented control over flock health and performance.
And don’t forget scalability. Our modular design allows expansion anytime. Need more layers next season? Add another row seamlessly. Planning to switch from conventional to enriched cages? We’ll help reconfigure your layout with minimal disruption.
No matter your region or production scale, we’re here to support you. From technical drawings and site planning to after-sales service and troubleshooting, Livi Machinery builds partnerships, not just products.
Ready to take your poultry operation to the next level? Share your farm details with us—cage type, house dimensions, bird count—and we’ll send personalized recommendations including setup diagrams and maintenance schedules. Just leave your name, email, and country below. Our experts respond within 24 hours.